The WordPress database serves as the foundation for countless websites today. It is widely acclaimed as the most user-friendly website builder platform, making it a preferred choice for inexperienced website owners. Despite lacking coding knowledge, WordPress enables users to achieve remarkable results.
If you have been utilizing WordPress for a considerable period, it is highly advisable to acquire proficiency in utilizing the WordPress database. This will enable you to maximize the potential of your website.
In this article, we will delve into the definition and functionality of the WordPress database, while also examining the process of exporting it. Let’s commence our exploration!
What Is a WordPress Database?
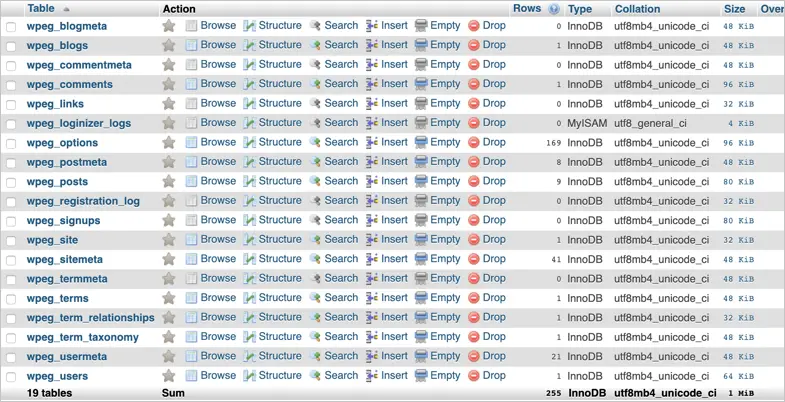
The WordPress database utilizes the MySQL open-source system to store all data related to your website. It encompasses a comprehensive range of information, such as pages, user data, plugins, themes, settings, and more. This data is organized into tables, rows, and columns. As an administrator, you possess the authority to add, modify, and delete any information within your website’s database.
To ensure a successful installation of WordPress, it is necessary to possess a MySQL database on your web server beforehand. Many contemporary WordPress hosting providers already include MySQL in their offerings for convenience.
During the process of installing WordPress, you will be prompted to provide a database name, host, username, and password. This crucial information, alongside other essential files, is stored in a configuration file called wp-config.php within the database. When performing actions such as creating, altering, reading, or deleting data from the database, WordPress sends a MySQL query to the database.
Consequently, when a user visits your site, their browser initiates a request to your web server. The server then transmits the data to the visitor’s IP address and presents the requested information. Reference Link
What is the need for exporting the WordPress Database?
Exporting the WordPress database offers several important benefits. Here are three key reasons:
- Create Offsite Backups: It is crucial to create offsite backups of the database as it contains all the essential data for your site’s functioning. By having backups stored in a different location, you can prevent unexpected data loss caused by server crashes or security breaches. With offsite backups readily available, you can easily restore your site’s data whenever necessary.
- Download Specific Website Information: Extracting specific information from your site’s database, such as posts, pages, and user data, can be valuable for business purposes. The WordPress database enables you to download only the selected information you require, avoiding the hassle of dealing with unnecessary data. To achieve this, it is recommended to export specific tables from the database to obtain the necessary information.
- Migrate Website Data: Instead of starting a new website from scratch, you have the option to export your old website’s database and import it into the new site. This approach not only saves time but also ensures that no data is lost when launching a fresh WordPress website.
Now, let’s explore an effective method for exporting the WordPress database.
01. How to Export MySQL Database Using phpMyAdmin
- To access phpMyAdmin, utilize your hosting control panel and follow these steps:
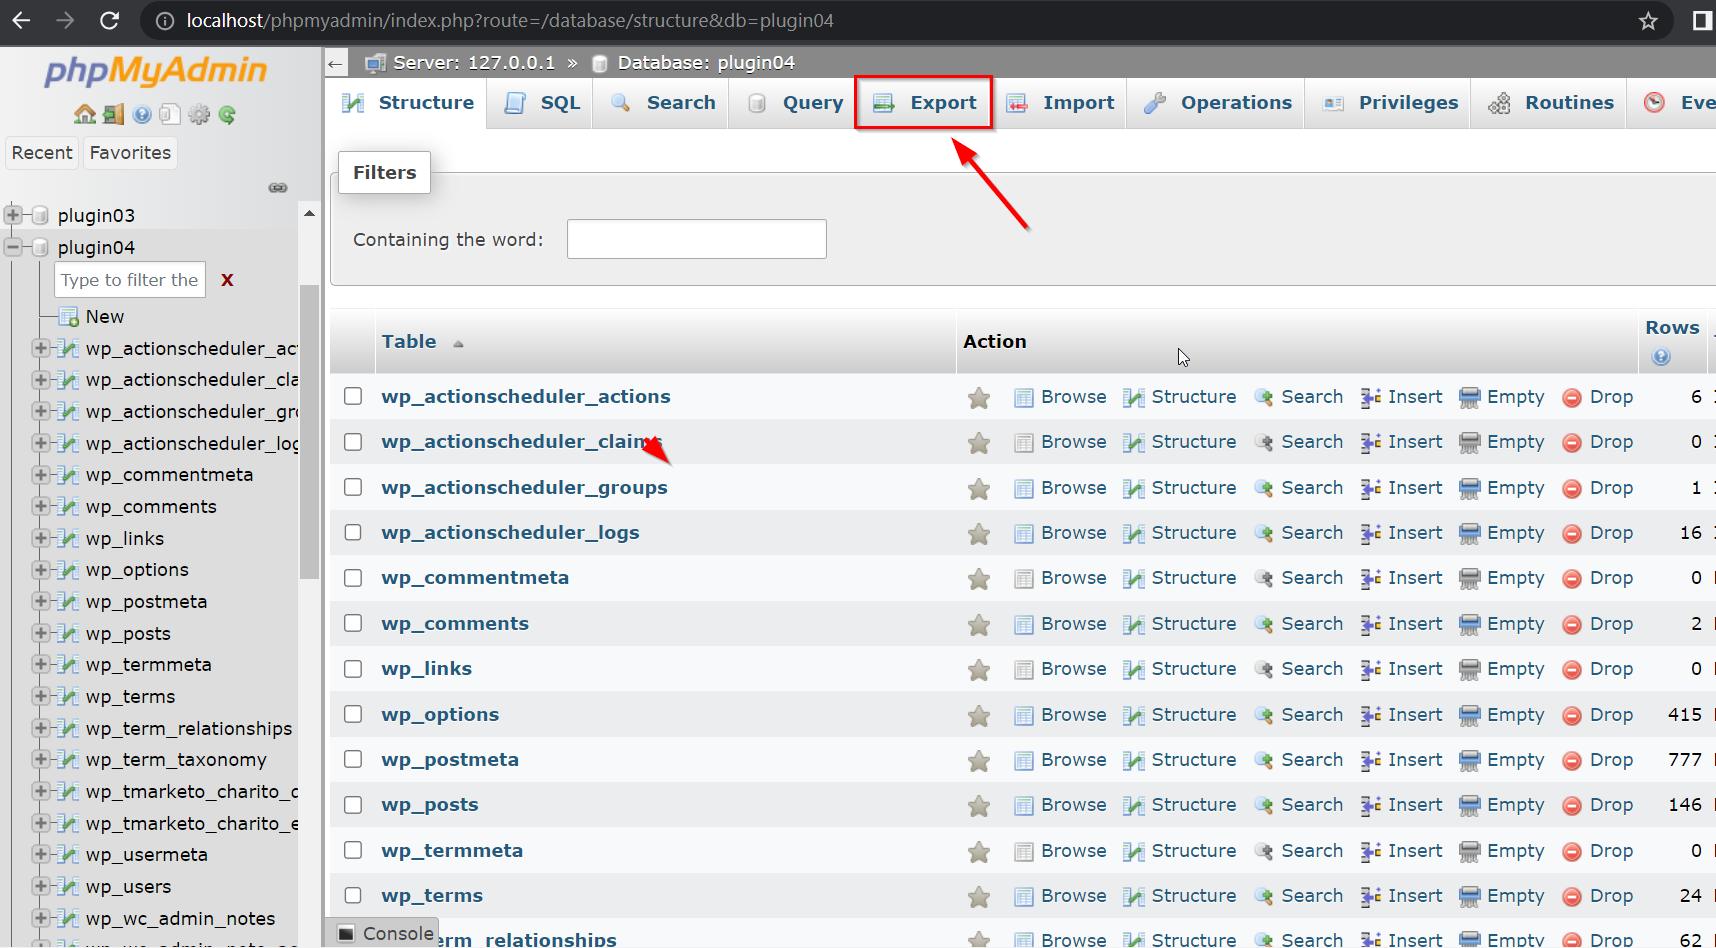
- On the left side of the phpMyAdmin dashboard, click on the MySQL database you intend to export.
- Proceed to the top menu bar and select the “Export” tab.

- phpMyAdmin offers two export options: “Quick” and “Custom.” If you desire the simplest method or lack familiarity with SQL tables, choose the “Quick” option.
- In the subsequent section, opt for “SQL” as the desired format for the backup file from the dropdown menu. The “SQL” format is commonly supported by various systems for importing and exporting MySQL databases.
- Upon completing the above steps, press the “Go” button.
To exert greater control over the backup process, opt for the Custom method. With this method, you possess the ability to modify three sets of configurations:
- Tables: Select specific tables for exportation.
- Output: Administer table names, and file name templates, and enable compression for the MySQL backup file.
- Format-specific options: Access compatibility settings tailored to the chosen backup file format. For instance, adjust the column separator while exporting the database as a CSV file.
02. How to Export MySQL Database Using WP-CLI
WP-CLI simplifies actions on your WordPress site through its command line tool. If you are familiar with SSH commands, you will observe the streamlined commands designed specifically for WordPress sites. Utilize the available WP-CLI commands for database export and import operations by following these steps.
To complete these steps, you must have the following:
- An SSH app. We recommend PuTTY for Windows or Terminal for macOS.
- Your FTP details. If you haven’t recorded them yet, please obtain your FTP host, username, and password using the instructions below:
- For your FTP host, you can use either your domain name or your IP address.
- To find your FTP username and password, follow steps 1 to 7 in your hosting account for Linux Hosting with cPanel or Managed WordPress Hosting.
To utilize WP-CLI on your VPS or DED Server, it is necessary to install it beforehand. Please note that WP-CLI is not supported on Windows Hosting plans.
Please follow these steps to backup or export the database through WP-CLI
- Use WP-CLI to export the database.
- Establish an SSH connection to your hosting account.
- Employ the bash command ‘ls’ to display files and folders, and navigate through directories using ‘cd’ and ‘../’ until you reach the directory containing your WordPress files.
- Execute the command:
wp db export filename.sql
In the given command, replace'filename.sql' itwith the desired name for the backup file.
03. How to Export WordPress database using SSH
The above-mentioned methods for exporting the WordPress database are excellent, but they are not effective for exporting large database files. When dealing with large databases, it is recommended to use SSH. However, this method requires considerable technical expertise and experience to handle the export properly.
Additionally, you must be proficient in using SQL and familiar with the mysqldump command to achieve the desired results. By running the mysqldump command, you can generate an SQL file containing a list of SQL commands that will create an exact copy of the database.
Before starting the process, make sure you have the following essential details:
- Database username.
- Database name.
- Database password.
To export a database over SSH, follow these assertive and simplified steps:
- Log in using SSH.
- By default, you will be in the home directory of your hosting account. If you wish to export the database to a specific folder, navigate to the desired directory using SSH commands.
- In the folder where you want to export the database, execute the following command: mysqldump -uMYSQL_USERNAME -p DATABASE_NAME > FILE.SQL You can choose any name for the SQL file. For example: mysqldump -uarmada_user -p armada_database > backup.sql
- Enter the database password when prompted. The export process will start and may take a few seconds to minutes depending on the database size. Once the command finishes, your terminal will return to its default position, displaying something similar to: [user@host ~]$ This indicates that the export is complete.